Ubisoft Connect Offline Setup Guide
Follow this step-by-step guide to sign in to your G2X Games Ubisoft account, complete 2-Step Verification, install your game, disable cloud synchronization, and configure Offline Mode for uninterrupted single-player gaming.
1. Sign In to Ubisoft Connect
Open the official Ubisoft Connect desktop client and sign in using the shared account credentials provided on your G2X Games My Games library page.
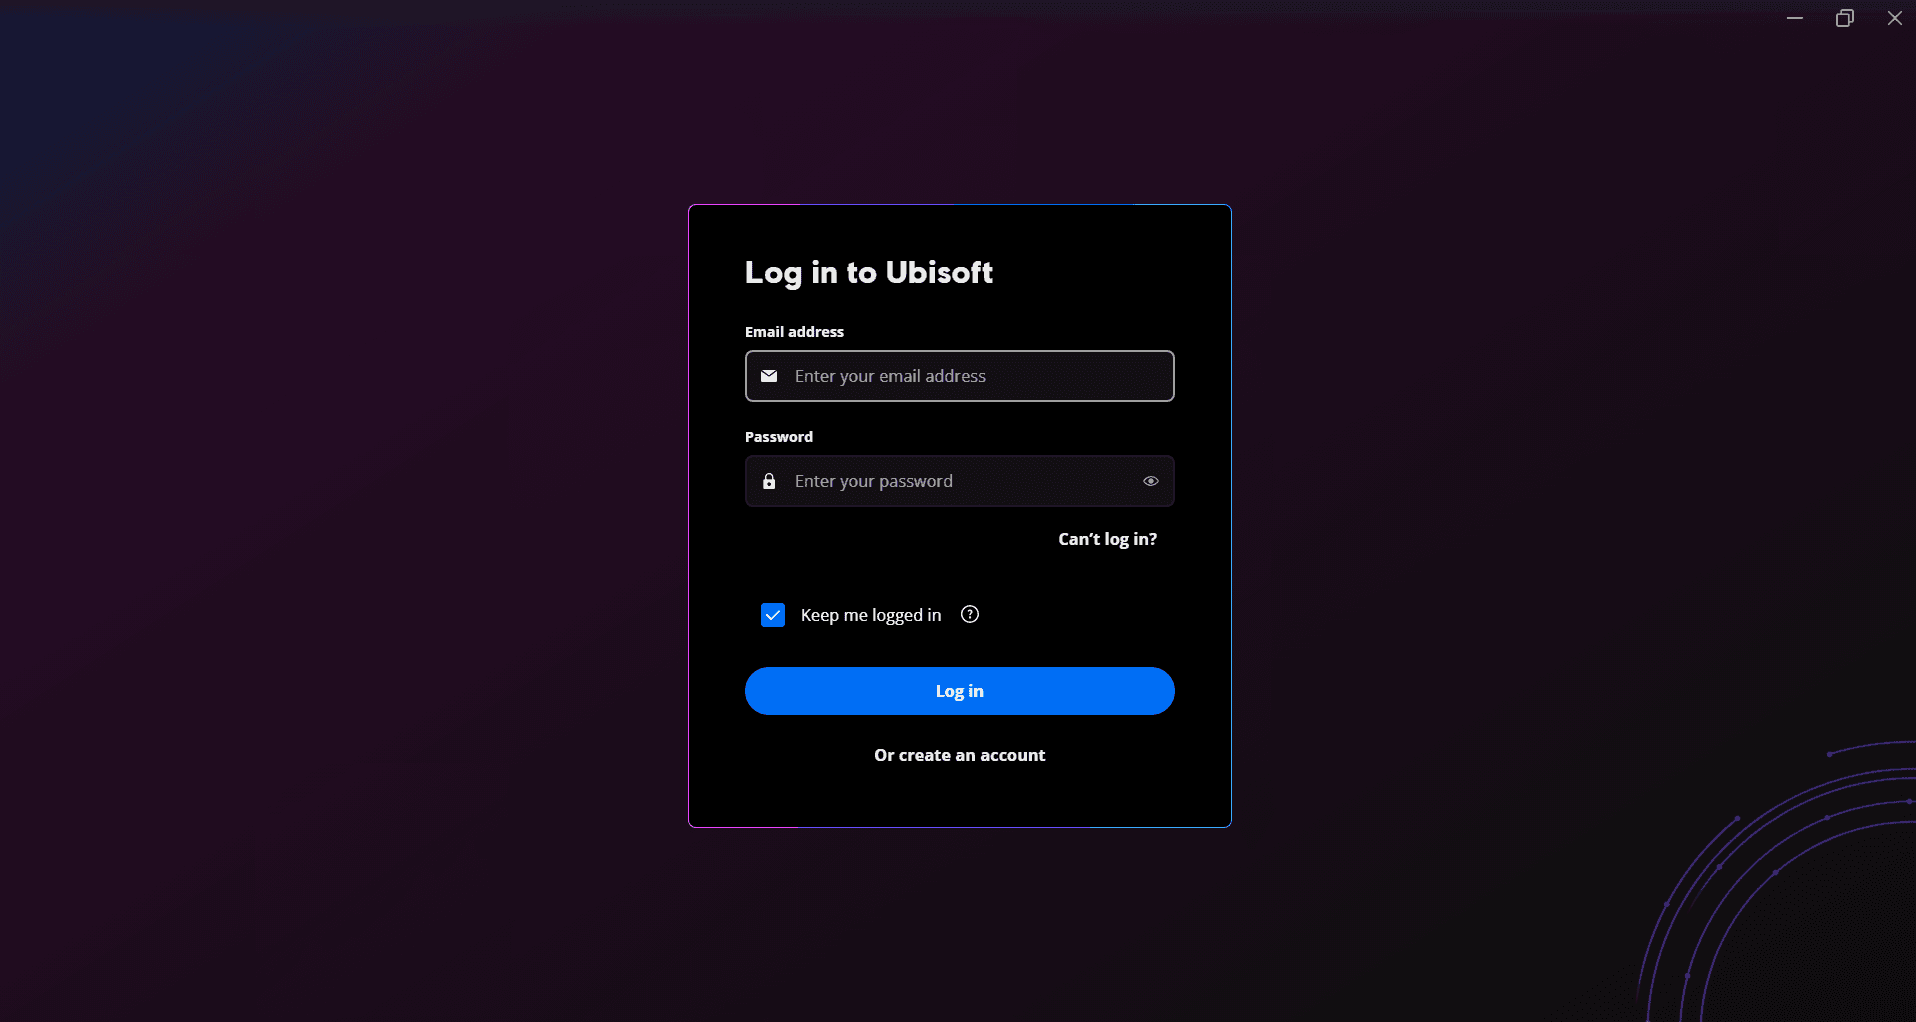
- Open the official Ubisoft Connect desktop client on your PC. If you are already signed in to your personal account, click your profile avatar in the top-right corner and select Log out.
- Enter the Email address and Password shown in the Account Credentials section on your G2X Games game page.
- Check the Keep me logged in box so Ubisoft Connect remembers your sign-in on this device.
- Click the Log in to continue.
2. Complete 2-Step Verification
Ubisoft Connect will display a 2-Step Verification screen requesting a security code. Use the G2X Games automated code retrieval service to obtain the required code.

- Keep the Ubisoft Connect 2-Step Verification window open. Do not close or cancel it.
- Open your web browser and navigate to G2X Games
Dashboard → My Games. - Locate your purchased Ubisoft game and click the Get Code button.
- G2X Games will securely retrieve and display the current 6-digit verification code.
- If available, enable Trust this device in Ubisoft Connect to remember your PC.
- Enter the retrieved code into the Verification code field and click Log in.
3. Download and Verify the Game
Locate your purchased game in the Ubisoft Connect library and install the official game files directly through the Ubisoft Connect desktop client.

- In Ubisoft Connect, navigate to the Library tab.
- Select your purchased game and open it
- Click the Download button to begin installing the game.
- Select your preferred installation drive and language, then confirm the installation.
4. Turn Off Cloud Save Synchronization
Disable cloud save synchronization in Ubisoft Connect so your single-player save files remain stored locally on your PC, preventing synchronization conflicts with other users.

- In Ubisoft Connect, click your profile avatar in the top-left corner and select Settings.
- In the Settings window, navigate to the General tab.
- Uncheck
Enable cloud save synchronization for supported games. - Click the Close button in the bottom-right corner to save your settings.
5. Go to Offline Mode
Configure Ubisoft Connect for offline play so you can enjoy your supported single-player campaign without online synchronization or interruptions.
5.1. Simple & Quick Method (Disconnect PC Internet)
The simplest way to play offline without modifying any firewall settings.
- Click the Play button in Ubisoft Connect while your PC is connected to the internet for the first time.
- Let the game load through all opening videos and reach the Main Menu. If shader compilation is required, wait for it to complete.
- Cleanly exit the game to desktop using the in-game Quit / Exit option.
- Disconnect your PC from the internet by unplugging your Ethernet cable or disconnecting from Wi-Fi.
- Launch the game again directly from Ubisoft Connect and enjoy your offline single-player session.
5.2. Advanced Method (Keep PC Online via Windows Defender Firewall Rule)
If you need your PC to stay connected to the internet for browsing, Discord, or work while playing offline, create an Outbound Rule in Windows Defender Firewall to block Ubisoft's background network connection.
1. Open Advanced Firewall Settings
Open Control Panel on your PC, navigate to Windows Defender Firewall, and click Advanced settings in the left sidebar.

2. Create a New Outbound Rule
In the Windows Defender Firewall Advanced Security window, click Outbound Rules in the left tree. Then in the right Actions pane, click New Rule....

3. Select Rule Type: Program
In the New Outbound Rule Wizard, ensure Program (Rule that controls connections for a program) is selected, then click Next.

4. Select Ubisoft Game Launcher Executable
Select This program path, click Browse..., navigate to your Ubisoft installation directory, and select UplayWebCore.exe. Then click Next.
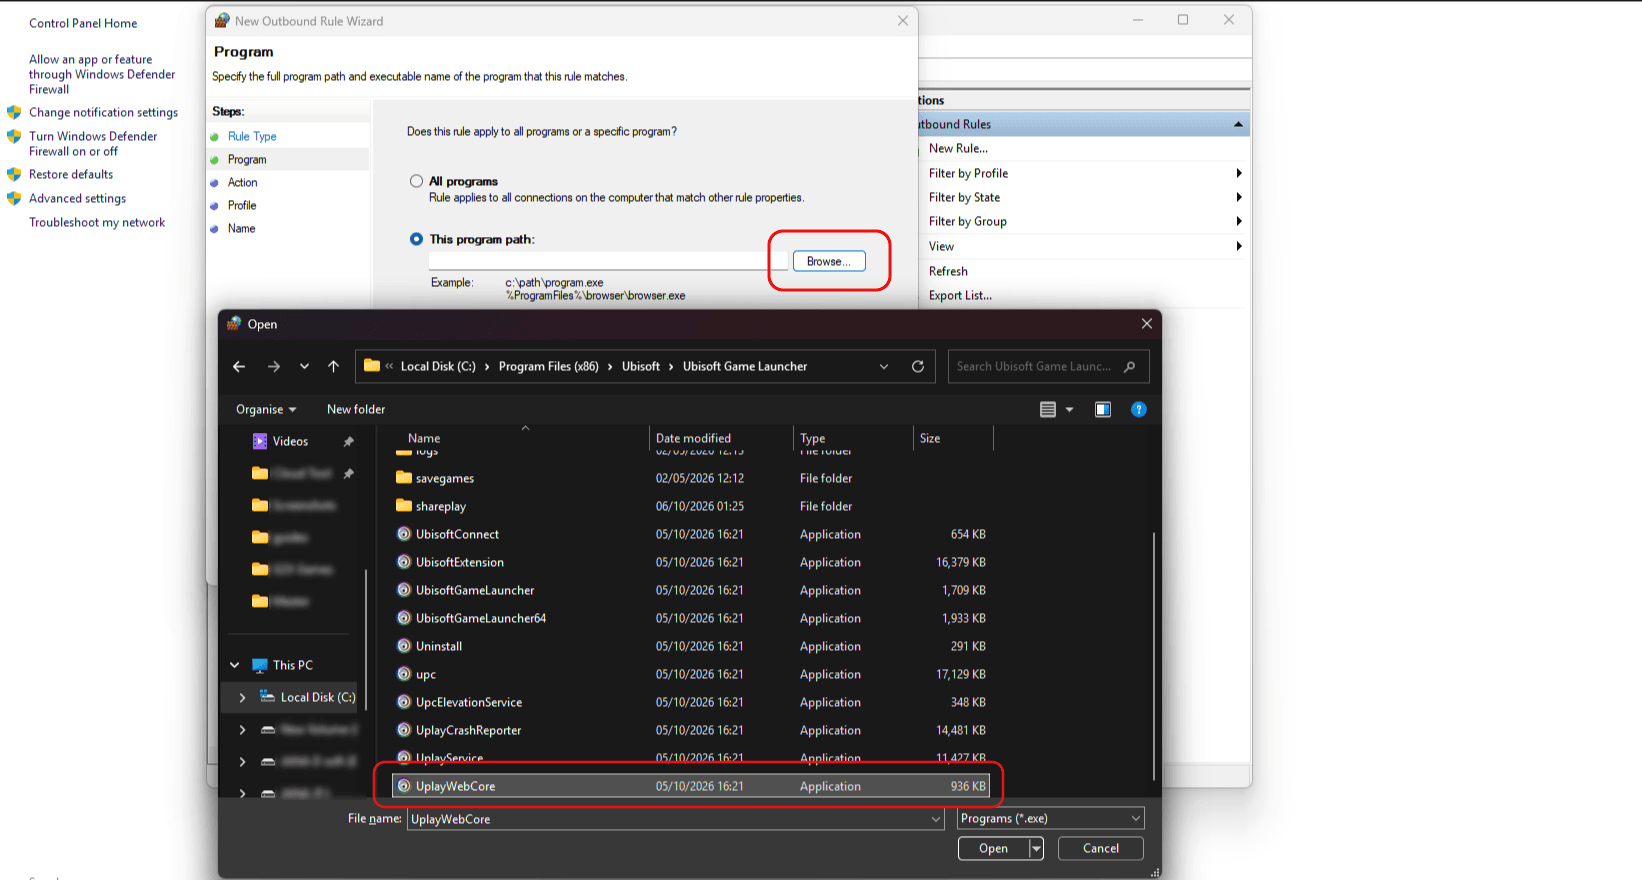
C:\Program Files (x86)\Ubisoft\Ubisoft Game Launcher\UplayWebCore.exe5. Choose Action: Block the Connection
Choose Block the connection as the action to be taken when a connection matches the conditions, then click Next.

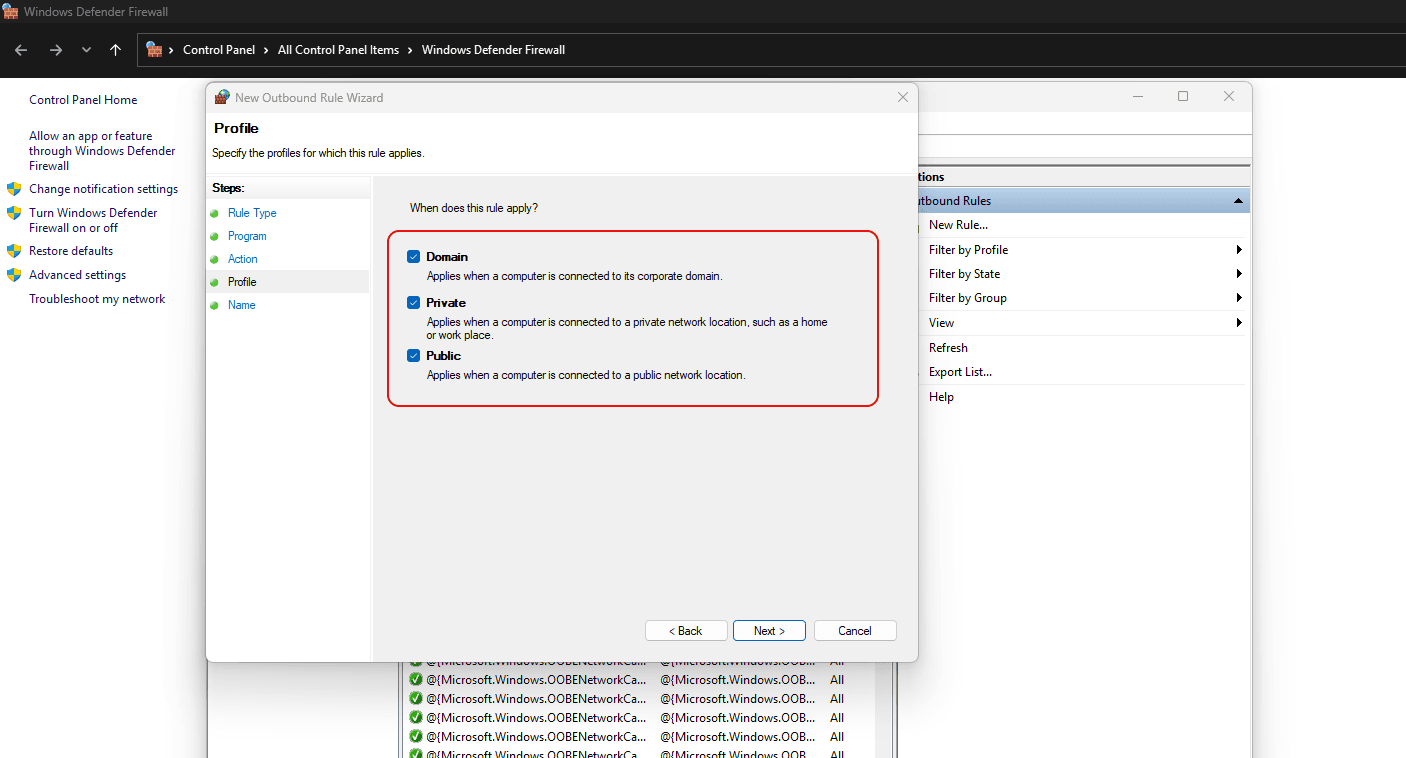
6. Apply Rule to All Profiles
Ensure all three network profiles are checked: Domain, Private, and Public. Click Next.
7. Name & Finish the Rule
Enter any recognizable name for the rule (such as Ubisoft Offline Activation) so you can easily identify or disable it later. Adding a description is optional. Then click Finish to activate the rule.

Frequently Asked Questions
Common questions and solutions for Ubisoft Connect offline mode
Other Platform Guides
Explore instructions for other gaming launchers



Still Need Help?
Having trouble with your game activation? Check our other guides or contact G2X Games Support for assistance.